I have a love/hate relationship with bagels. Good, chewy, bagel-shop bagels = love. Grocery store, cardboard bagels = hate. I worked at a local bagel store (the long-since defunct Daily Bagel) for a few months in colleges, and really got spoiled by the wonderful bagels that they made there. Not till I made the bagels myself did I find a match for their yumminess. Since regular-sized bagels contain more bread than any (5′ 3″) human should consume in one sitting, I make mine mini.
This recipe is adapted from Smitten Kitchen, and her recipe is adapted from Peter Reinhart’s book The Bread Baker’s Apprentice.
This makes 24 mini bagels. Please note that this is not a quick process and you should start the night before you want to bake them!
Start with 4 cups of white whole-wheat flour. Stir 1 teaspoon of instant yeast into the flour, then stir in 2 1/2 cups of room temperature water. It will make a sticky batter. Cover this with plastic wrap and allow to sit at room temp for 2 hours. The “sponge” will get double in size and get really bubbly when it’s ready.


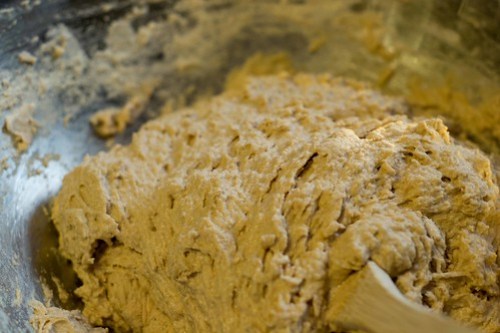

At this point, stir in a tablespoon of salt, 1/2 teaspoon of yeast, and 2 teaspoons of barley malt syrup or malt powder….and now, here’s the work. Stir in about 3 1/4 cups of flour. I usually make all of my breads by hand, stirring them with a wooden spoon, but this sponge was so stiff I couldn’t even stir in the first cup of flour by hand, so I swallowed my pride and scraped it into the bowl of my stand mixer and used my dough hook. I worked in the flour a cup at a time then let it knead for about six minutes. You want a really stiff but pliable dough. Take the dough out of the mixer and divide it into pieces about 2 1/4 ounces each (I weighed them, of course). The last 2 pieces were slightly smaller (2 ounces and 2 1/8 ounces). Roll the pieces into balls and place them on sheet pans lined with parchment that has also been sprayed with oil. Cover with damp towels and let them rest for 20 minutes. After the rest, punch a hole in the middle of each ball and slightly roll them so the hole doesn’t look like a tear. Place them back on the oiled parchment paper, then spray the tops with oil and cover them with plastic wrap. Allow to rest for another 20 minutes then place in the refrigerator overnight.


When you are ready to get your bagel on, take the bagels out of the refrigerator. Preheat the oven to 500 degrees with the racks set in the center of the oven. Set a large pot of water on to boil; when it gets to a good rolling boil, step back and toss in a tablespoon of baking soda. Seriously. STEP BACK! I also added a couple of tablespoons of barley malt syrup at this point as well to give the bagels a little extra color. This water mixture looks seriously nasty. Skip this step, though, and you will sacrifice the chewy quality that is so important to truly perfect bagels.


Float a few (4, 5, 6) bagels in the boiling water for a minute or two on each side (the longer you boil the chewier they’ll be-I go with two minutes on each side) then use a slotted spoon/spider/strainer to remove back to the parchment lined pans, which at this point I have sprinkled with cornmeal. Once all the bagels have been boiled and the oven is preheated, bake for five minutes, then rotate the pans and lower the oven temp to 450 degrees. Bake another five minutes or until the bagels reach the color that you like them. Remove to cooling racks.


I freeze my bagels in a single layer on a half-sheet pan, then transfer to a freezer bag to be pulled out one or two at a time for breakfast or a simple lunch. Cream cheese is classic, but I also love Boursin and avocado, butter and honey, cream cheese and jam, or a good old bagel sandwich (one of the most popular items we served back in my Daily Bagel days was chicken salad on a bagel).


Comments